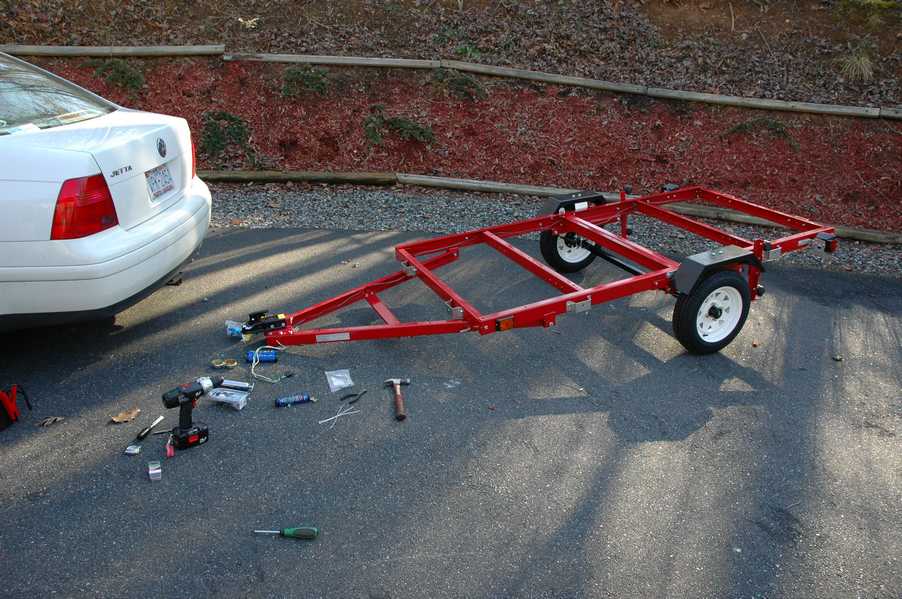
Assembling a Trailer Kit

Harbor Freight sells a 4ft by 8ft folding utility trailer kit, and this is my story of the assembly process.
You can see the kit in its native retail environment here: https://www.harborfreight.com/cpi/ctaf/Displayitem.taf?itemnumber=90154
As you probably know, Harbor Freight tends to run periodic specials that rotate through their product line. They sell several similar utility trailers, but the one I have is the 90154, which is 4 x 8 and has 12" tires. The regular price is $299, but in the month I got mine it was $229 online and $239 in the store. It turns out that the shipping would have been $60 online, so unless you live more than $50 away from a store, it is probably better to pick it up. Keep in mind too that they don't charge sales tax, since the state DMV gets plenty of taxes instead.
I decided to get a small trailer so that I could have the transportation convenience of my small truck without having the small truck. In particular, I wanted to transport a motorcycle from central Florida, which makes for about 12 hours on the road. The small truck that I have is probably not up for that kind of trip. I also wanted to be able to make runs to Lowes when the truck was out of town. The HF 90154 fits the bill for me mostly because of the size and cost. The folding feature is a handy bonus, since I can get it into some semi-indoor storage and increase its longevity indefinitely. The weight rating according to the instructions is 1450 pounds, which is more than my VW Jetta can comfortably tow from what I hear.
My first step before purchase was to make a few phone calls. First I called the DMV to figure out how much it would cost to get a plate and keep it renewed, along with exactly what kind of documentation I would need to bring to get a title. In North Carolina, it was $19 per year plus the county's personal property tax, and they have a $40 fee for getting the title. In the end it was $72.50 including the notary fee. The only documentation that they wanted was a Certificate of Origin and bill of sale, and of course a photo ID.
My second call was to the insurance company to figure out how that would all work. It turns out that in my particular policy the liability of the trailer is included with the tow vehicle. While there is not any coverage for damage to the trailer, who cares? Its not like it would cost more than $299 in parts to fix, right?
My final step was to work on the logistics of getting the kit. Since I was expecting boxes that were too big to transport in the car, I had to pick them up with the truck, and since the HF stores are somewhat sparse where I am, it took some planning. I also called the store to make sure that they had a kit in stock for that price, and they offered to hold one if necessary. I would suggest that you do the same, unless you can be happy with going to the store to find out that they don't have any. It turns out that the kit might have fit in the car, but not very well. Count on two people to handle the largest box.
I did encounter a bit of a surprise at the store. My plan was to pick up the kit late on Monday, then leave town on Tuesday morning to take it to the assembly site. It turns out that someone from HF must notarize the certificate of origin, and their notary was out for the day. One of the store employees went out of his way to get it notarized and send it to me in the mail. It turned out to be OK, but when it did arrive it was all that I was waiting for. Be sure to ask about this if it will be a problem.
Before the purchase I also spent some time researching online to see exactly how crappy this very inexpensive trailer would be. There seemed to be a consensus among other web pages that though the trailer was indeed inexpensive, it was still a fairly useful product for the price. As for assembly time and complexity, most people said to expect quite a bit of head scratching and at least two days of work. Since I couldn't find any specific construction logs, I decided to make one with a list of tools and an actual timeline of how long each step took for me to do. Be sure to click on the small picture if you want to see more detail.
| Assembly Process and Timeline | |

|
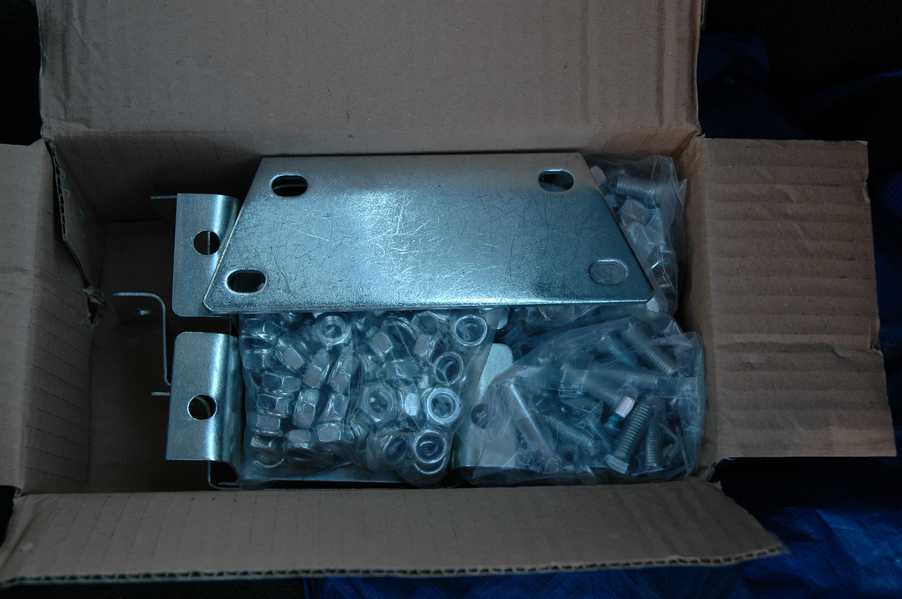
The kit came in two boxes. According to the boxes, the long one is 157x30x16 cm (62x12x7 in.) and weighs 71kg (157lbs), and is probably best handled by two people. The smaller box is 70.5x28x57 cm (28x11x22 in.) and weighs 40kg (88lbs). That's a total of 245 pounds, so according to the conservation of mass, you know the trailer is going to weigh less than that before decking. |

|
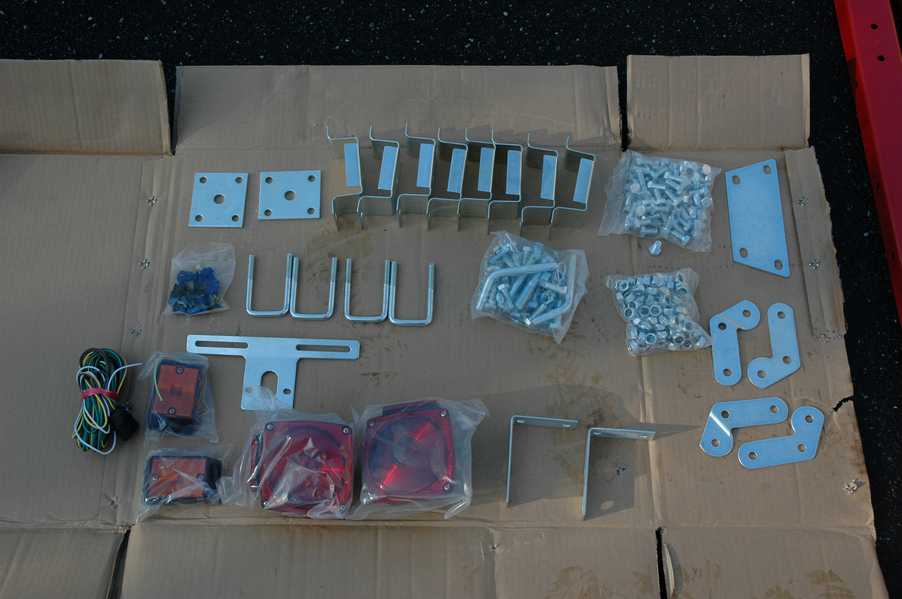
The obvious first step is inventory, partly to check for all of the parts, but partly to try to figure out what all is in the boxes. This step is a little bit more complicated than it should be because the parts list has separate listings for parts that are already assembled. For instance, this isn't just a wheel that you are looking at- it is also 4 lug nuts, a hub, a grease fitting, a dust cap, a castle nut and cotter pin, and an outer bearing. |

|
The smaller kit box contained a few smaller boxes, like this one that included the lights and wiring. I found these boxes to be especially handy during construction for transporting hardware and tools around the trailer as I worked on it. I dumped the loose nuts and bolts, ratchet and sockets, and wrenches into the box and that kept everything in one handy and transportable spot. |

|
The instruction manual is available online from HF in PDF format here. I would suggest downloading it. There were a few subtle changes in the kit compared to the manual, but I was able to figure most of them out fairly well. The good news is that it appears to have been written by a native english speaker. |
|
The hardware on the trailer isn't galvanized. It is just zinc plated, which probably will not provide a lot of weather resistance. The standard setup seems to be 3/8" bolts with nylon lock nuts. Most bolts are 3/4" long, with a few 1" long where needed. |

|
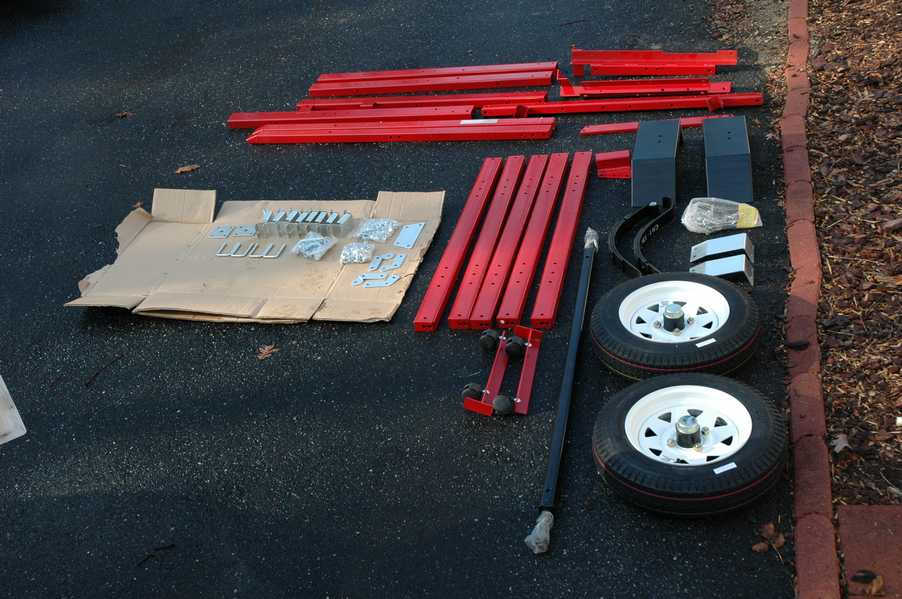
My favorite part of the inventory was to lay the parts out in an organized fashion. I used to do the same thing with construction toys when I was little. To be fair, I have to say that the assembly process was my favorite part of this whole trailer adventure. |

|
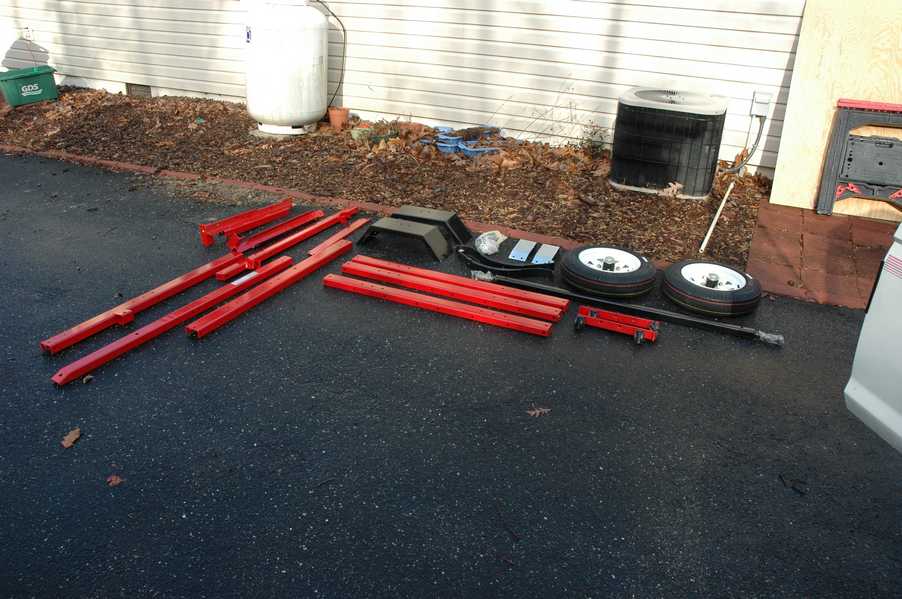
Now for the big box. You can tell that the folks who packed it knew what they were doing. I guess it pays to spend some serious thought on packing when you are going to send something all the way from China. |

|
The left front tongue piece has a riveted-on data plate with the serial number etc. |
|
The layout area gets bigger... |
|
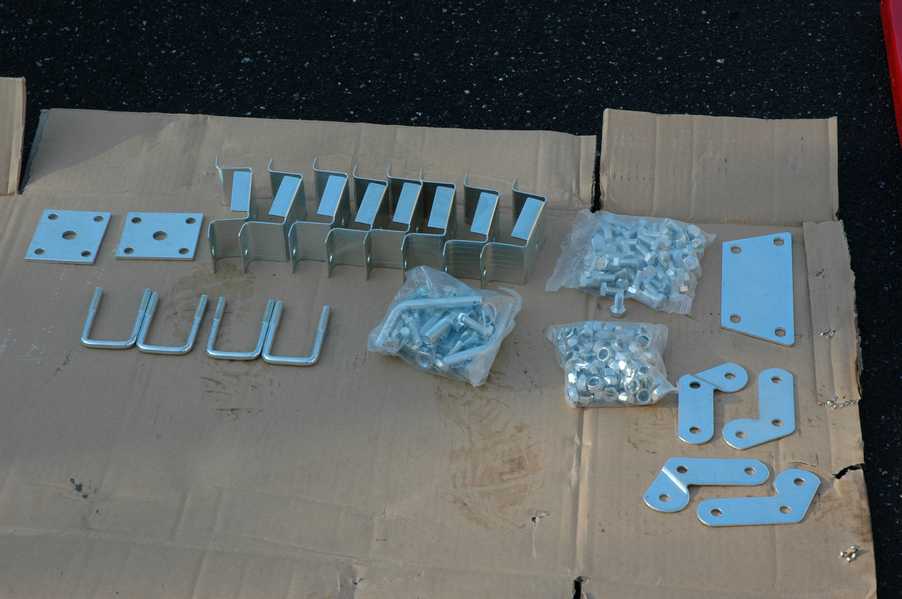
Here are the stamped parts and the U-bolts. |
|
...everything else from the big box |
|
More lighting and hardware |

|
Doesn't it just look like fun? |

|
With the remainder of the parts out, the inventory process is complete. According to the time stamp on my pictures, it took exactly 30 minutes to get this far. |

|
The first assembly step involves laying out what will be the front of the trailer. |

|
The line drawing isn't imediately clear, but the cross members have two holes on the end, and the two holes should be oriented as in this picture. |
|
The blue and yellow dots are for identification of the parts... |

|
... but of course mine were wrong. 3L should have been 1FL. I checked to be sure that the 3L sticker hadn't just rubbed off of the real 3L, but that was not the case- it was just labeled wrong. |

|
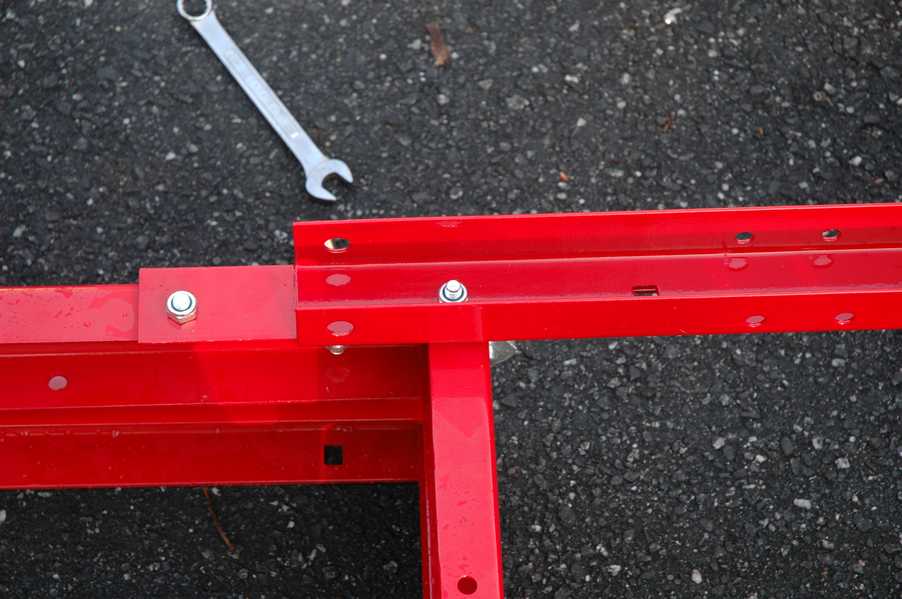
With the parts laid out, it was time to get out the tools and start bolting things together. The common strategy of starting all of the bolts before tightening any is a must. |
|
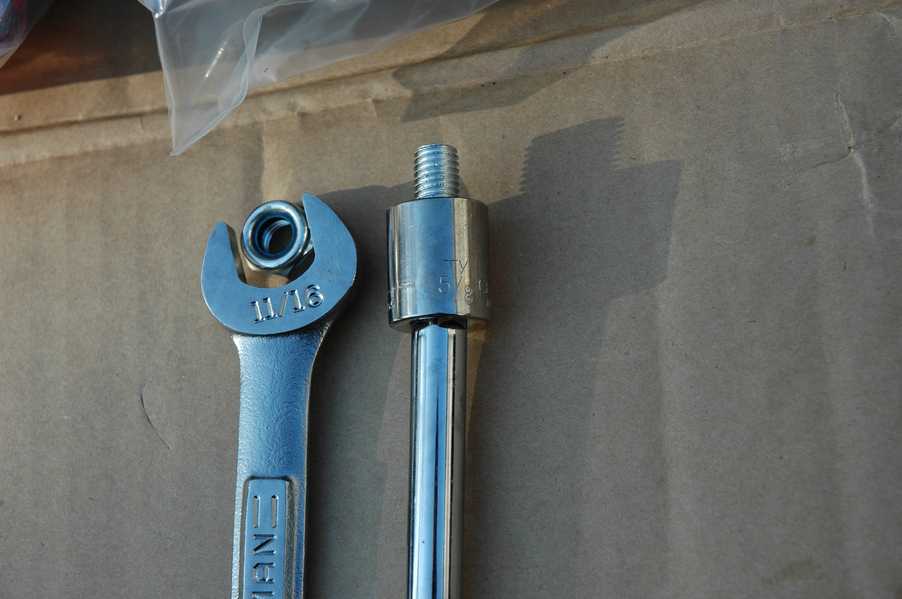
When you go to the toolbox, be prepared with at least a 5/8" socket and an 11/16" wrench. I would also suggest that you grab an extension and ratchet, and the opposite setup (11/16" socket and 5/8" wrench). |

|
The instructions aren't all too clear about when to use 1" bolts and when to use 3/4". I found the easy way to decide was just to think about how many layers of metal the bolt had to go through. If the bolt was going through the side rail and the cross member only, use 3/4." But, if it is going through one of the little silver brackets too, use the 1" as shown in the next picture. I found the box to be a handy caddy. |

|
If you are going to use the brackets for the side rails, you have to put them on when you assemble the frame. They share bolts with the cross members. I would suggest that you do put them on, as I found them to be handy protection should the trailer come in contact with something like a tree, building, other car, or whatever. |

|
Likewise with the hinge piece, use the long bolt in the back. This is logical, since the back bolt has to go through an extra part. |

|
I started the front bolt first, since it wasn't related to assembly of the frame parts. |

|
Another view. |

|
In this picture you can see that the long bolt goes on the right while the short bolt goes on the left. You can repeat this theme in other cases where multiple layers mean longer bolts. |

|
If you are in a rush, I would suggest using an automatic ratchet or impact driver of some kind. One of the most time consuming parts of the job was tightening the nylon lock nuts with the ratchet. Here is a picture of the finished step 1, exactly 22 minutes after I started. Combined with the inventory, total time so far is 52 minutes. |

|
Step two is all about attaching the parts that will make the tongue. |

|
You won't really need the tools in the picture for this step, since the nuts are not nylon lock nuts like before. They thread on quite easily by hand. Since they are actually pivot points, they aren't intended to be tight. |

|
I spent some time trying to figure out how these parts were supposed to go together, but in the end I found that there is really only one way. The tapered point doesn't go inside the slot on the front rails, because that wouldn't allow the tongue to fold down. |

|
Here it is easy to see how the tongue will pivot. Step two took 10 minutes, bringing the total time to 1:02. |
|
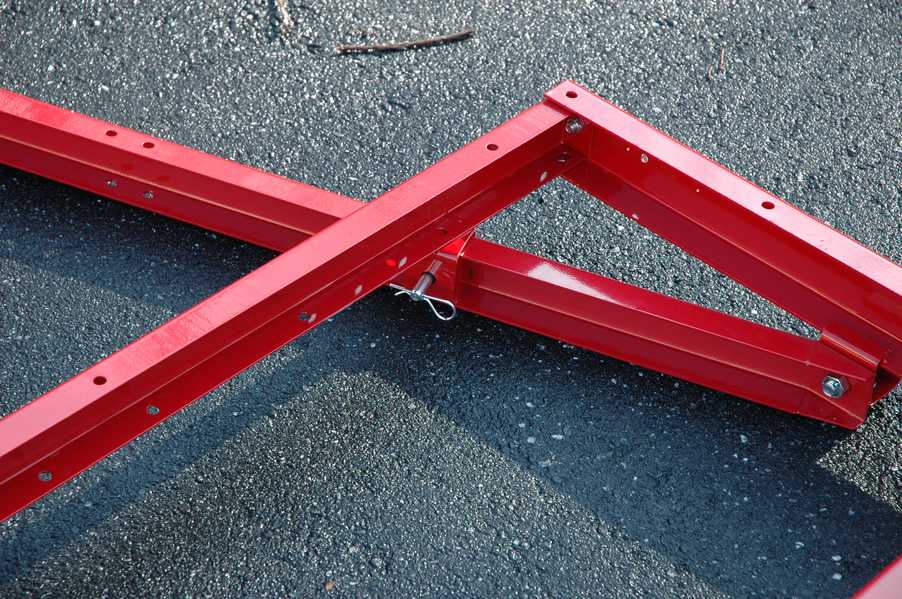
Step 3 is just a matter of inserting the pins and attaching their retaining clips. When the trailer is done you will remove these to fold the tongue down. |

|
It only took one minute for this step, making the total time 1:03. |

|
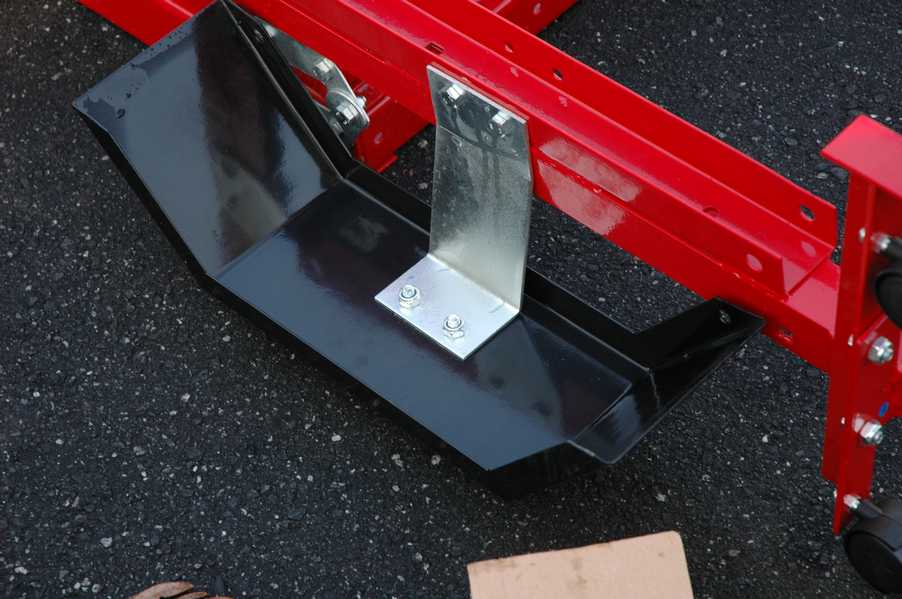
Step 4 was to attach the spare tire bar. They didn't include a spare tire or the harware for it, but there is a bar there nevertheless. Add 6 more minutes for 1:09. |

|
At that point I had to go to work, so I stopped and piled everything up. The assembled half was still quite reasonable for one person to carry around. |

|
Step 5 was another fairly quick one. |
|
Very little head scratching, and 5 minutes. Total time 1:14. |

|
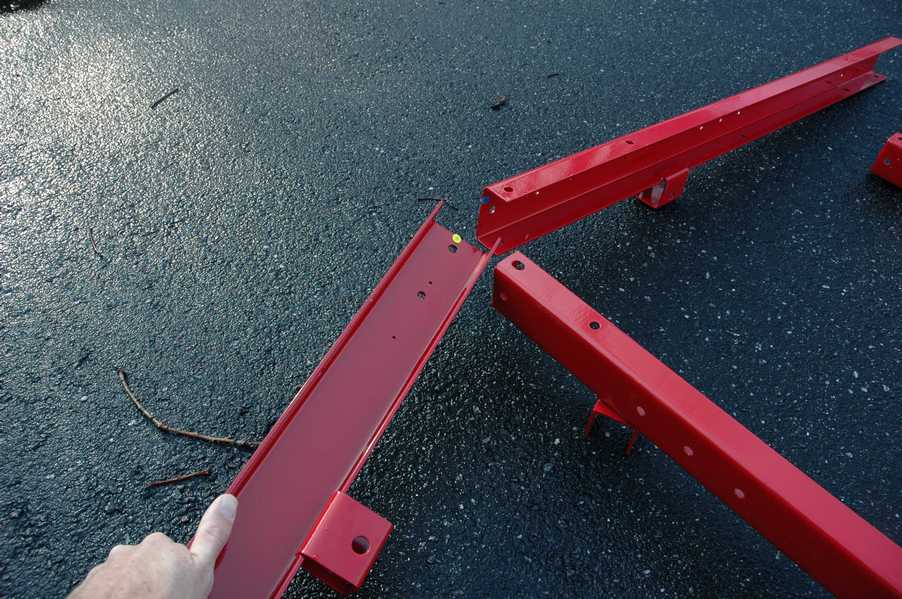
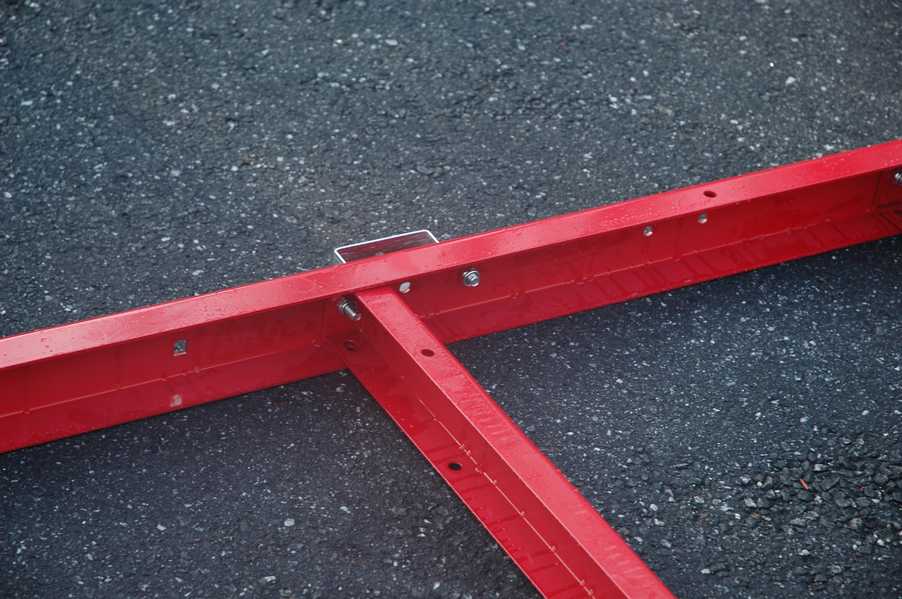
Step 6, on the other hand, was a little bit more involved. It did take me a little while to realize how the hinge parts came together, but you can see how it goes in this picture. |

|
The back went together just like the front, although a little faster. |
|
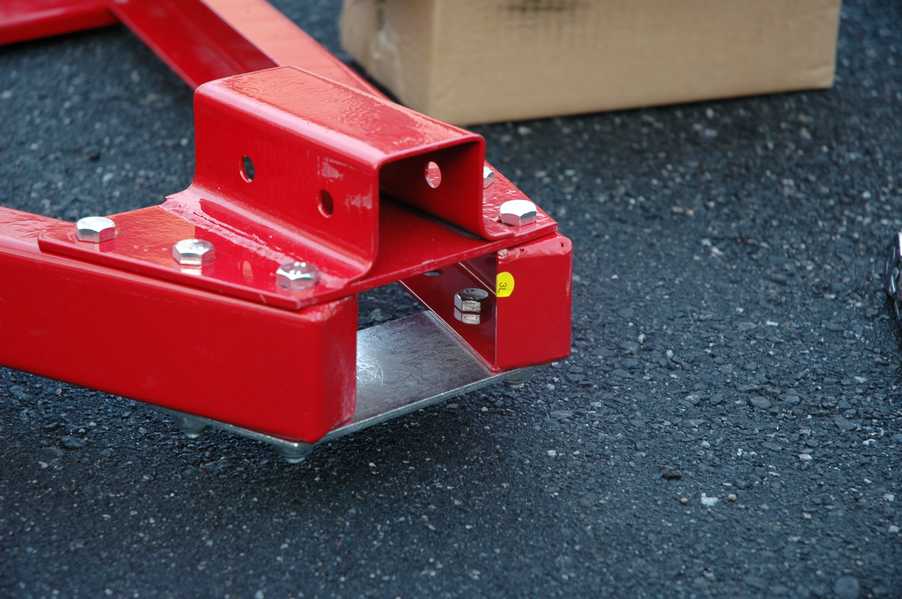
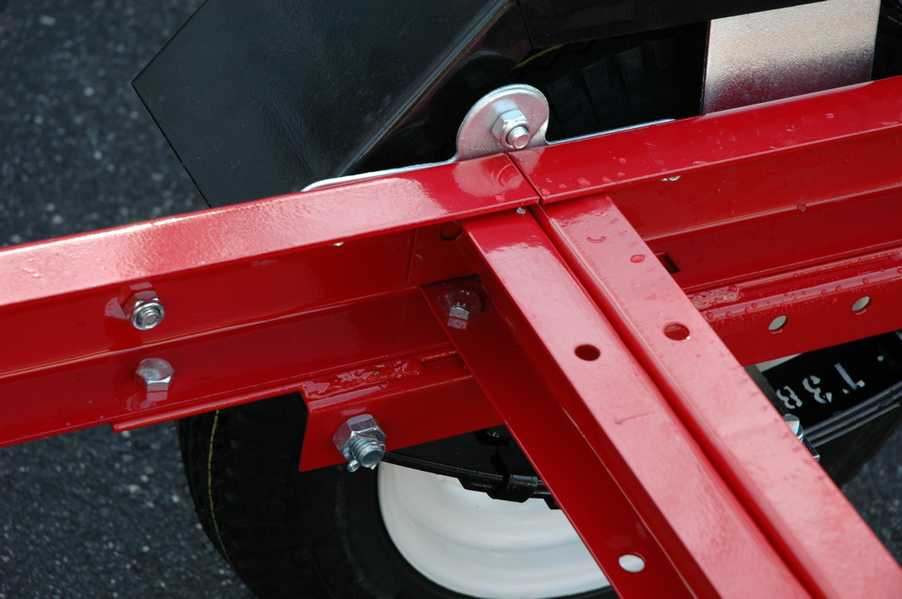
You can see that there is a hole in at the bottom of this junction. It didn't seem to me that the directions called for a bolt there, but when I got finished I had enough 3/4" bolts to fill those holes too. It seems like it adds some strength to the trailer, and it definitely helps to have something to contact the ground in the back corners. More on this later. Step 6 took a total of 18 minutes, making total time 1:32. |

|
Step 7 was another quick one. |
|
Here is another view of how the hinge plate should be installed, in case you had any doubts earlier. |
|
I was surprised that the hinge mechanism pivots on the threaded portion of the bolt and not some kind of bushing or shouldered bolt. I guess that's where the $239 comes from. |

|
Here it is, ready to fold. |

|
Since I was just dying to try it, I folded the back over onto the front. |

|
The astute reader who also has the instruction manual might see a small difference between this photo and the line drawing for the next step in the instruction manual. I was not astute enough to see it at the time, which is part of why the next step took me so long. |

|
This picture shows the limiting factor in the thickness of plywood that you can use for the deck and still have a flat-folding trailer. I can say that unless you use counter-sunk fasteners, it probably won't fold flat. If you use 3/4" plywood per the instructions, you can count on it not closing even if you counter-sink the fasteners. Step 7 took 3 minutes all together, for a total of 1:35. |

|
Step 8 is the one where you attach the suspension support to the frame that you have already constructed. I took the part over to the frame to see how it fit, only to find that it really didn't fit at all. After quite a few minutes, I finally figured it out. To get to the picture for step 8 you have to fold the front over onto the back, not the way that I did it in the picture above. This is a picture of how it should look, with the front (and tongue) on top. |

|
At this point I had to loosen the bolt that held together the frame in order to get the holes to line up for the spring hanger. It goes back to that basic principle of starting all the bolts before tightening any. |
|
Once I figured out which side of the frame to attach to, it was pretty easy to get the parts attached. |

|
Step 8 took 23 minutes (mostly figuring it out), bringing the total to 1:58. |

|
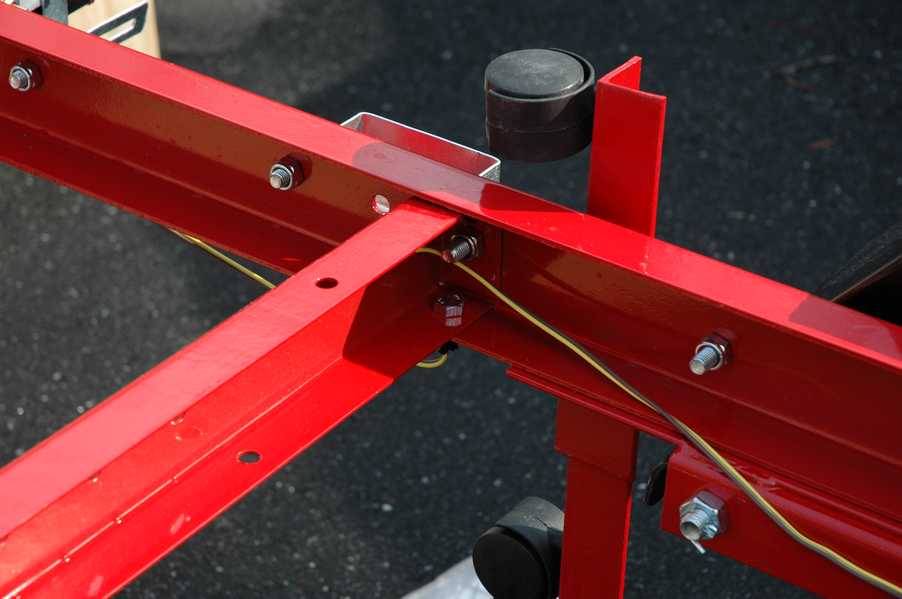
Step 9 was just a matter of attaching the caster pieces to the spring hanger. |

|
With just 6 minutes, the total after step 9 was 2:04. |

|
Step 10 was already done, since the casters were attached to the caster bases. Step 11 was where the book started to get a little weird. They said to attach the fender seats to the caster bases, but they actually attach to the spring hangers. This wasn't too hard to figure out though. |

|
If you go by the directions, you'll put these silver fender seats on first, then attach the fenders to the seats. I'd suggest that instead you either attach the fenders to the seats first, or that you just wait until you flip the trailer back over to put them on. It's hard to get under the fenders to turn the bolts. |

|
Other than that little problem, there wasn't much to this step. |

|
It was nice to get some color other than red on the trailer. I have to give them credit for picking out some nice colors. |

|
Loose bolts become tight. |
|
Throughout construction, I tried to keep the locknuts on the bottom of each fastener, in hopes that rainwater wouldn't collect and promote corrosion. Step 11 was 12 minutes, for a total of 2:16. |

|
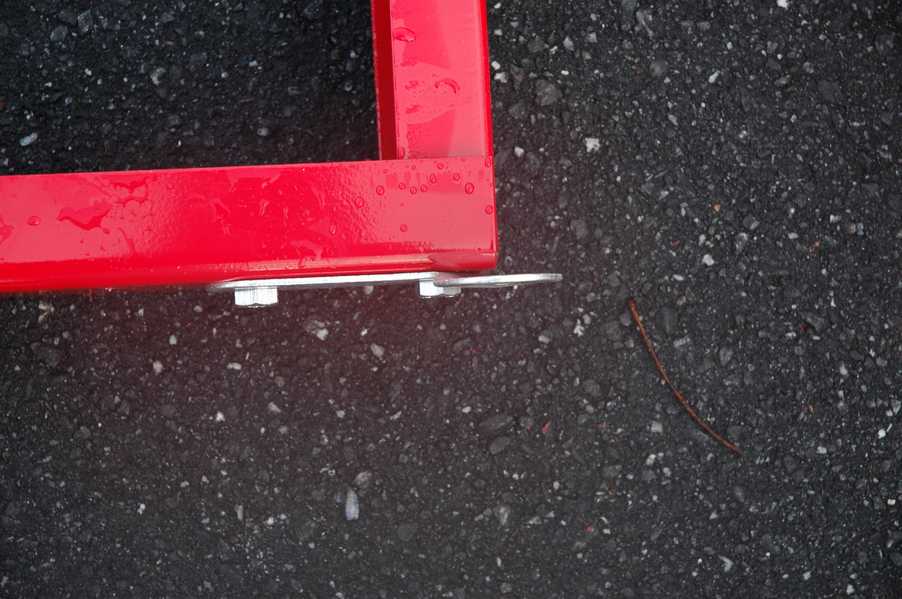
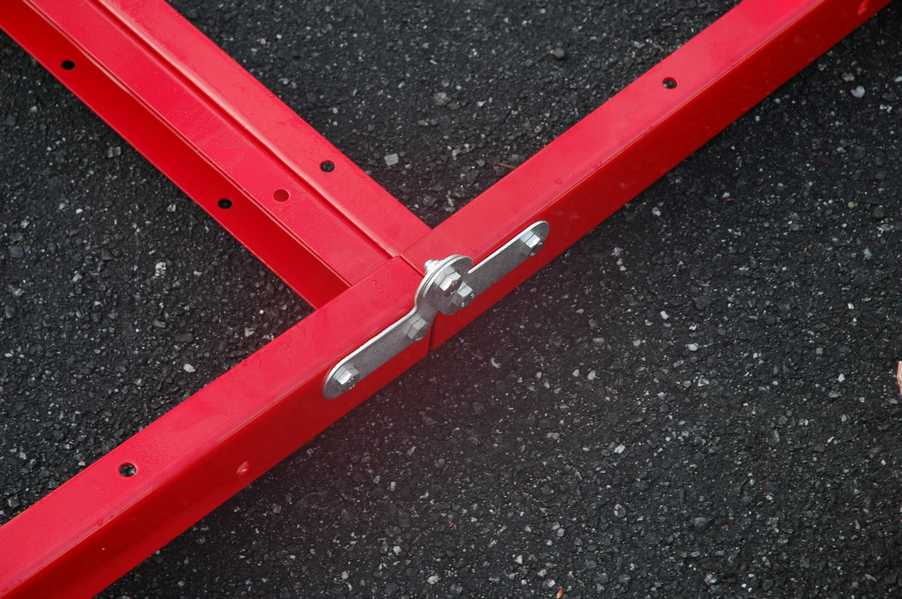
The front of the hinge attaches with a bushing for very little play. |

|
The back, on the other hand, is all wiggly and jiggly. |

|
Step 12 took just 5 minutes, bringing the total to 2:21. |

|
Step 13 involved a little more technique than the other steps, since you can't just tighten the nuts until they are tight. I found the best method was to tighten the nuts on one U-bolt until they looked close to correct, then to tighten the others to about the same point. From there it's easy to alternate from one side to the other, making a nice even plate. |

|
Here you can see the closer side tightened to the "approximate" stage. |

|
By looking from this perspective you can see how level the plate is. |

|
And of course the other side goes the same way. For those of you who are still deciding about buying the trailer, the axle does have a small recess that fits into a dimple-like key that sticks up from the spring. That makes alignment of the tires automatic. Step 13 took 12 minutes, bringing the total to 2:33. |

|
You'll need a couple more tools to put the hubs onto the axle. I didn't take too many pictures of putting the wheels on, but I can tell you to that you will want to be sure to have a grease gun and some extra grease. They don't tell you that anywhere except for in that step. |

|
Also, I would suggest that you carefully snug up the grease fittings. Both of mine were less than finger-tight, and I also ended up breaking one off with my grease gun. They are even cheaper than the cheapest ones I've seen, but a whole variety of replacements was only $6. All of steps 14-17 took 20 minutes, so the total so far is 2:53. |
|
So here it is on its own wheels for the first time, and ready to start step 19. Since it was just a matter of attaching the coupler, it only took 6 minutes, bringing the total to 2:59. |

|
It's back to the box-o-screws again, though the box is getting empty pretty fast. |

|
I put the stake clamps on, even though I'm not planning on filling them any time soon. I don't have any pictures of step 20, but it only took 2 minutes. |

|
At just 7 minutes step 21 is done, and the total is now 3:08. |

|
Now it was time to get the lights on. |

|
The running light was pretty cheap plastic, but then it was included in a pretty cheap kit. |

|
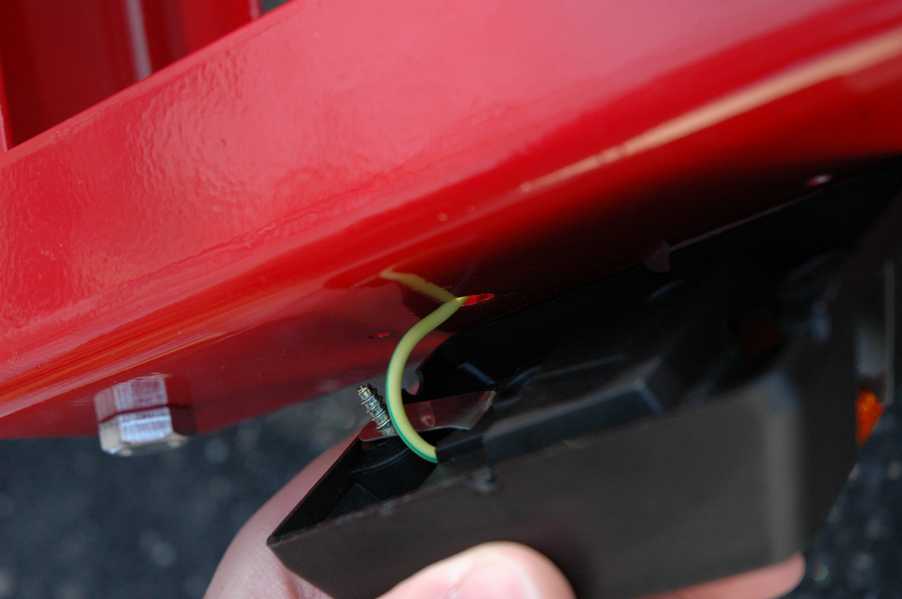
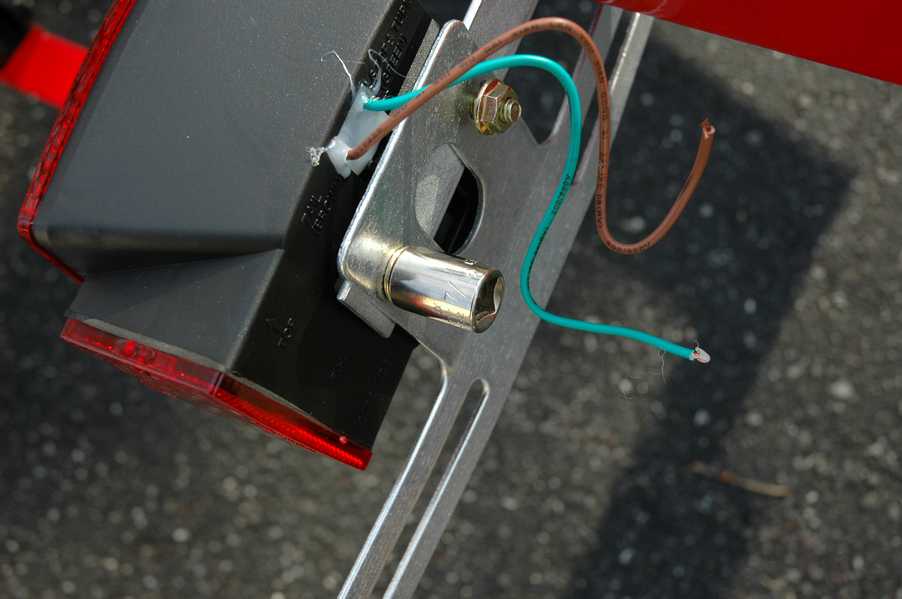
Being made out of plastic wasn't really a problem, but I did have a problem with the way the wire was routed. Since the ground is carried through the trailer, there is a silver colored grounding tab that runs over to the attachment screw. The trouble is that the positive lead rests on the relatively sharp edge of the grounding tab. |

|
Over time this wire could easily rub on the sharp edge and create a short. |
|
At first I figured I would just flip the light around and route the wire differently, but I ended up overtightening and breaking the mounting lug for the light. |

|
So I used a little super glue to reattach the lug, then went back to the old wire routing. I did try to leave a little loop of wire inside the plastic case for the light, and it hasn't shorted just yet. That was step 22, and it took a 13 minutes for a new total of 3:21. |

|
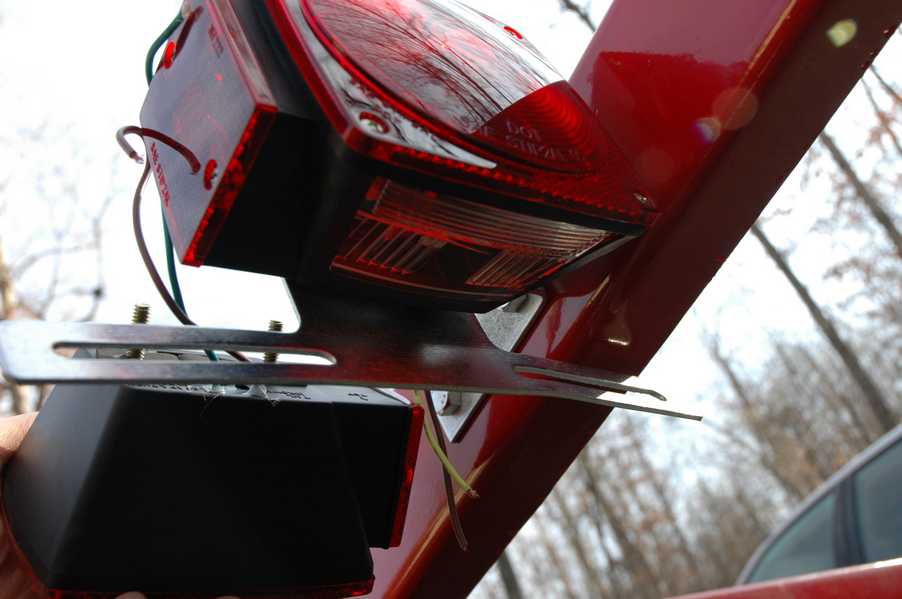
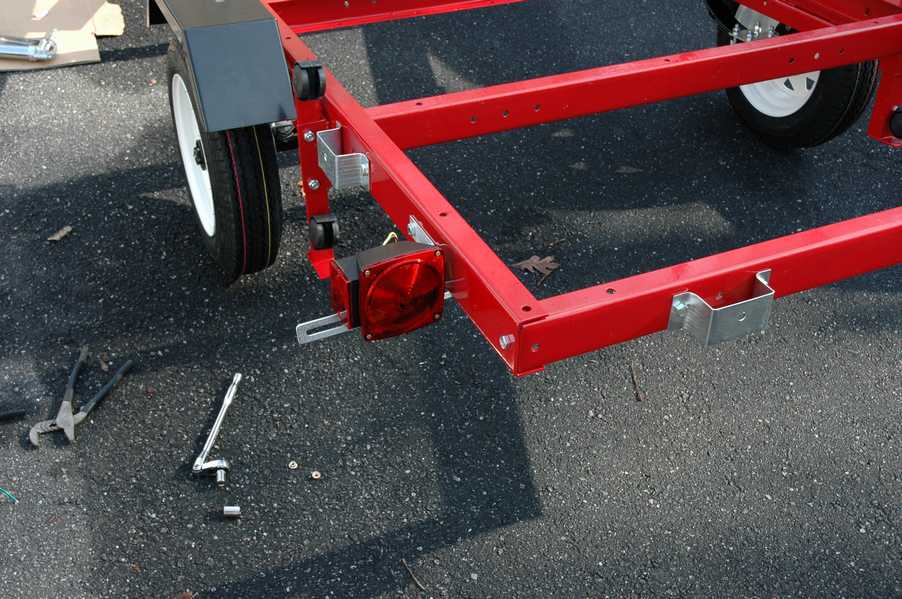
The tail light bracket was really no challenge. The holes are arranged so that you can't get it wrong, just as long as you put the protrusion towards the back of the trailer. |
|
You'll need a 7/16" socket or wrench to install the tail lights to the brackets. |

|
Do you see anything wrong with this picture? |
|
Be sure to put the lights on so that they face the rear. This picture has it right, and I don't know how I did it wrong the first time. |
|
The left light has a clear lens on the bottom to light up the tag. |

|
The outboard lens also acts like a running light. |
|
Here is step 23 finished in 13 minutes. The new total time is 3:34. |
|
Step 24 is one that you will have to undo any time you want to fold the trailer. In the stock configuration, folding requires a few tools, about 10 minutes, and really two people. I also had to loosen the screws that mounted the spring hanger (once again called the caster base by the book) in order to get the holes to line up for this step. |

|
Also, don't get lazy and be sure to tighten these all the way. If not, the road vibration will make a mess out of the screws. It probably doesn't hurt to plan on tightening the screws in the hinge plates before towing for the same reason. Step 24 took 12 minutes, bringing the total to 3:46. |
|
This is where I pretty much departed from the instruction manual. In this picture everything is ready for wiring. |

|
I didn't use any of the electrical hardware provided with the kit. I'm sure that it would be fine with the stock hardware, but I already had the tools and supplies on hand for soldering. I started by soldering a terminal end on the grounding wire. |

|
To get started, I laid out the wires. Green on the trailer's right, yellow on the left. |

|
You can see that my parts collection is pretty much gone. |

|
In the process of routing the wires, I decided that I had enough hardware to go ahead and fill the holes on the bottom of the frame. Here you can see the back left corner. |
|
Here is another extra screw where the cross member attaches. |

|
And another. |

|
And another- for 8 all together Be sure to leave enought wire for folding at the middle joint and for the tongue to fold down. I foresaw the middle joint but not the tongue. Had I stuck with the instruction manual, I probably wouldn't have had this problem. |

|
I did all of the wiring and the extra screws in a total of 1:22. So now it is ready for plywood, completely finished as far as the included kit parts are concerned, in 5 hours and 2 minutes. |

|
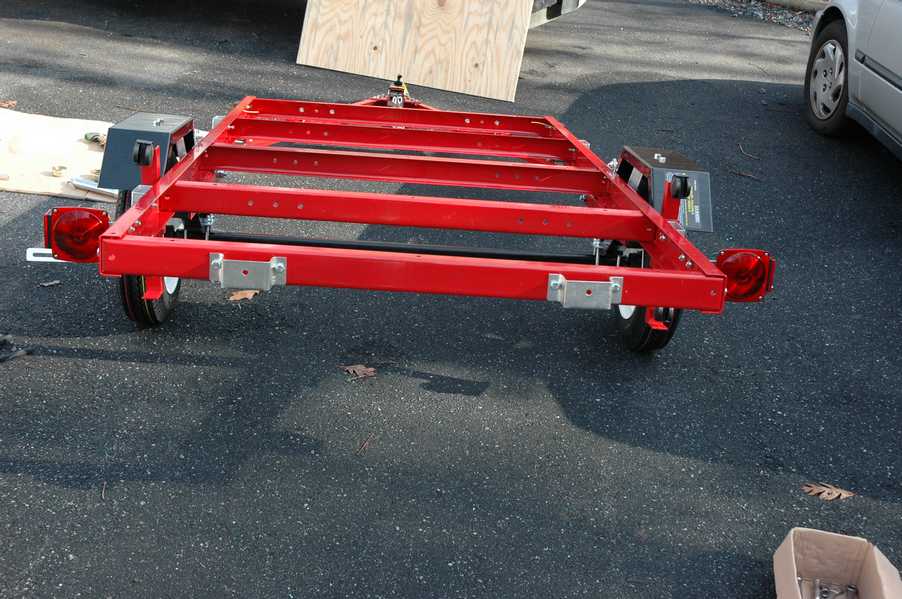
I decided to use 5/8" plywood for the deck. Since the fasteners that I used were not countersunk, the trailer didn't fold completely. This doesn't really make too much of a difference, since I just used a piece of rope to hold the trailer in the folded position. |
|
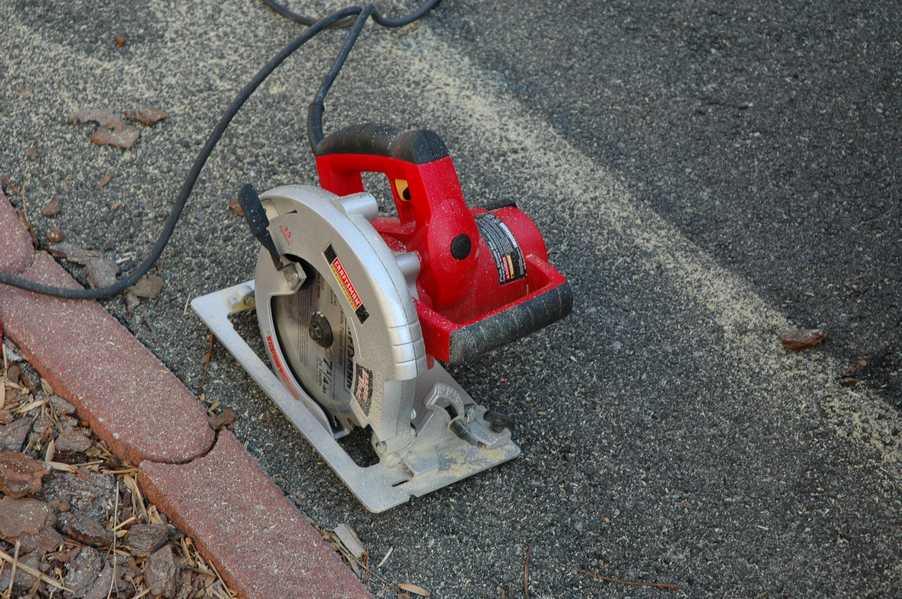
I found a circular saw to be the easiest way to cut the plywood sheet in half. If you don't have one, just have the home improvement store cut it for you. |
|
Before I attached the plywood I wanted to take one more trip around the trailer to be sure that the wires were run nicely. Working with anything under the trailer becomes much more difficult once the deck is on. |

|
I also ran out of grease, so I had to get a bit more. They don't tell you that you need grease, but I guess it isn't that hard to find. You can get a gun and some tubes for around $10 if you shop around. If you can spend a little more, I really like this one. |

|
Here is my extra loop for the middle section to fold. |

|
Don't attach the wire to this hole, since the hole doesn't move with the corresponding trailer half during the fold. |

|
Here is the folded version, showing the gap that determines the maximum plywood size. |

|
I found it prudent to take the corner off of the plywood so that it could clear the hinge bolt. |

|
I used a 3/8" drill bit for the bolts that hold the plywood down. Rather than marking from the bottom, I measured the locations for the holes. And occasionally, I missed by a little bit. In those cases I enlarged the holes in both the metal and the wood. |

|
Here you can see where I didn't leave enough wire. I extended the little yellow lead that comes from the running light and that fixed the problem. |

|
From this view, that extension just seems like the most logical choice. |

|
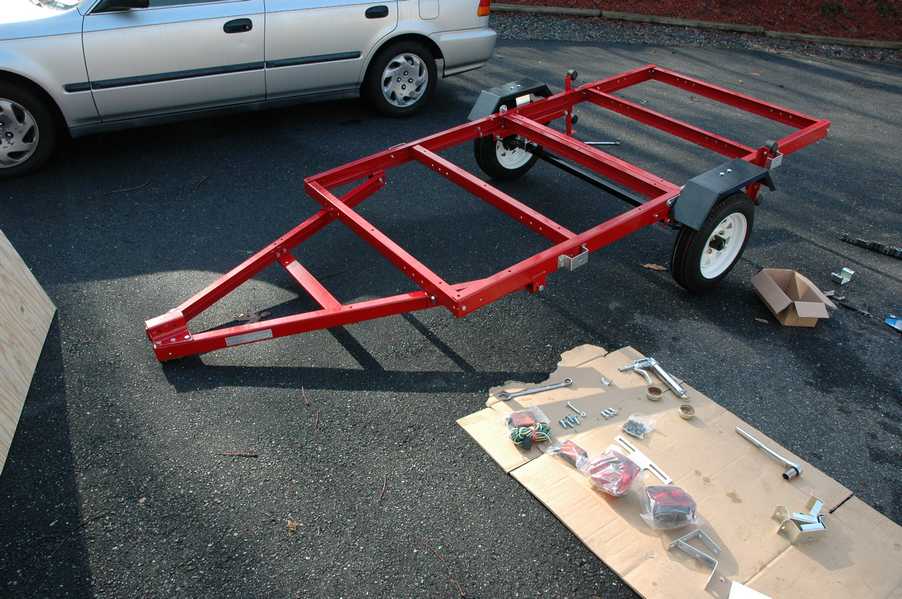
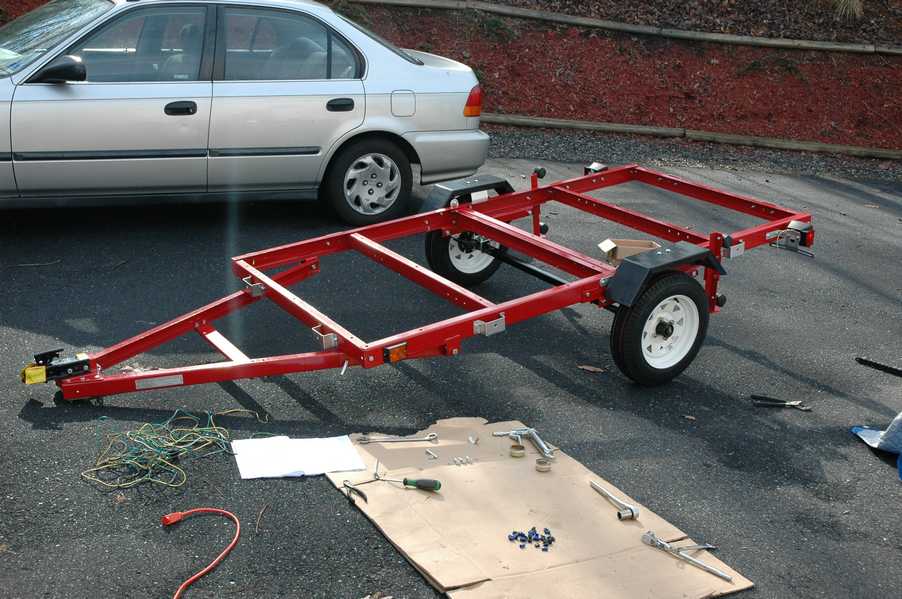
Here is the trailer after its first 600 miles or so. It did fine both empty and loaded. |
I decided to play it safe and buy a spare tire from HF, even though it wasn't on special this month. Just imagine the "I told you so" implications of having a flat on the side of I-95 at 11:00 at night. I tossed the whole box in the trunk and headed off to Florida, only to find once I got there that the box also included a special lug nut U-bolt to attach the spare to the trailer with. This was really exciting, since I didn't have to buy the $10.00 spare tire mount, and now I can tell you so neither do you!
Timeline:
Inventory: 30 minutes
Step 1: 22 minutes
Step 2: 10 minutes
Step 3: 1 minute
Step 4: 6 minutes
Step 5: 5 minutes
Step 6: 18 minutes
Step 7: 3 minutes
Step 8: 23 minutes
Step 9: 6 minutes
Step 10: already done (Thanks, Mr. Chinaman!)
Step 11: 12 minutes
Step 12: 5 minutes
Step 13: 12 minutes
Step 14-17: 20 minutes
Step 18: 2 minutes
Step 19: 6 minutes
Step 20: 2 minutes
Step 21: 7 minutes
Step 22: 13 minutes
Step 23: 13 minutes
Step 24: 12 minutes
Wiring: 1 hour 22 minutes
The total time to get the trailer ready for the plywood deck: 5:02
I spent an additional 1:28 to get the plywood on, for a grand total of 6:30.
As for money, the kit was $240, the wood and hardware were $32, the spare was $45, and the tag was $72. The total before the tag is $317 and the ready-to-use total of $389.
In summary, I think the trailer was just right for what I needed. It isn't going to last forever, but then again it was pretty inexpensive for what it is. In the end, I spent 6.5 hours and under $400. If you think this is what you are looking for, I'd say you should give it a try.
8-2007 Trailer Update:
I've made a few trips with the trailer now, and I have a few updates. I've driven a total of about 2000 miles and have only had a few minor problems.
The first problem is that the original casters failed, as I had expected. They were not really strong enough to support the weight. I got 4 replacements at my local hardware store for around $4 each.

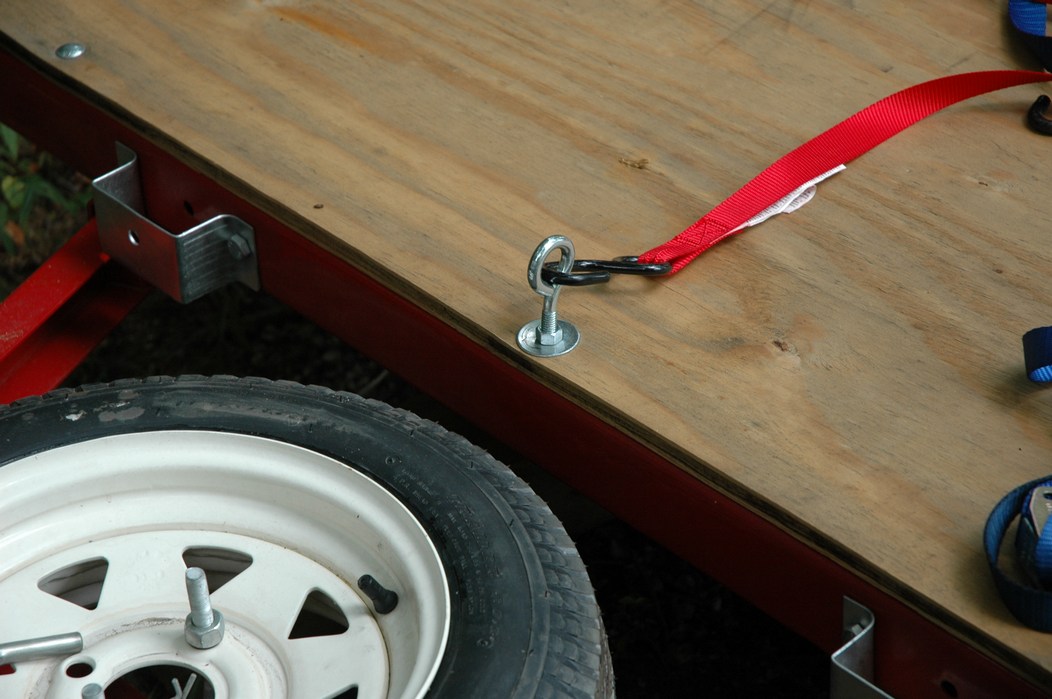
I also replaced two of the carriage bolts with eye bolts. This allowed me to carry two motorcycles on the trailer instead of one.

I have also had some shorts develop in the wiring, which has blown a few fuses on the tow vehicle. The trouble is with wire insulation breaks that allow the conductors to short to the frame. I'm starting to think that some better grade wire or perhaps some protective conduit could help.
I sold the trailer in 2012 or so after using it for all sorts of crazy adventures. At one point I loaded it with what I realized later was probably 3000 pounds of lumber including some 16-foot 6x6 posts, and I'd definitely not recommend that. I think the 1200-pound limit is probably a bit conservative, but trailers have a way of getting dangerous quickly with much more than 1000 pounds of stuff. When it was overloaded, I found that it was much more likely to sway, and all the way home I was just hoping that the axle didn't snap! That's not a fun way to get around. If you have a big load, just borrow or rent a bigger trailer and keep this little guy around for the small stuff. Now I have a 7x14 trailer that can carry much more, but it is also harder to move around and work with, and probably 1000 pounds heavier empty. I also am much more reluctant to loan the big trailer out, since it is harder to manuver and handle. If storage had not been a problem, I probably wouldn't have sold the little 4x8 trailer, and if I had specific needs for another, I'd not hesitate to build another one of these.
If you have any tips that might help out other builders of the trailer, send me an email and I'll add them here!