|
|
|||||||||
|
|
|||||||||
|
|
|||||||||
|
|
|||||||||
|
|
CB350 Part 2
Click here to go back to part 1With most of the essential repairs done and a little bit of cosmetic work, it was time for some riding. One problem with riding with an oil leak is that you have to be prepared to add oil every now and then.


The good news is that it rides fairly well. There are still a few problems with the clutch, but the brakes have livened up with the adjustment, and it is nice to have the power of the 350. On my first trip I started out slow on local roads. I stopped to look over everything and didn't see any problems. From there I went out to the local 4-lane highway to pass cars. It may seem silly to be excited about passing cars, but you have to keep in mind that the CB has at least two features that make passing easier. One is the bigger engine, and the other is turn signals. I got as fast as 70 miles per hour, and then took the next exit for another inspection. The oil leak had picked up to a more regular drip, so I took it back home.
Here are more pictures of the luggage rack bracket and the new headlight. The old light didn't work on the low beam, which seems pretty common. The stock bulbs on the CB are not a standard size, so you won't be able to go to the auto parts store and get a round sealed beam replacement. There are companies that offer sealed beam upgrades to halogen, but those upgrade kits seem to also be available only in standard sizes. In order to upgrade to a halogen bulb, you would have to find a bucket from another motorcycle that would fit the standard blub case. The other problem with the halogen bulb is that some people who have made the switch have said that the old electrical system has trouble keeping up with the power demands of the new bulb. These two reasons were good enough for me to postpone any plans to upgrade.
I spent a few minutes with the mirrors and some chrome polish. The stems are badly pitted and will not polish well, but the rest of the mirrors saw some real improvement.
My next effort was to try and improve the side covers with some polish. In the first two pictures you can see the difference in the logos. The smaller one seems to be original to this year of side cover. The switch must have been from a long time ago, since the paint is in such great shape under the wrong one. I haven't seen an easy place to find replacements for these yet. I used the first two steps of a three step process that I had on hand, and you can see the results of each test in a picture with the bottle. The end result was just to show more of the blue layer, which is a predictable result after removing more of the orange layer. This bike certainly has a good side and a bad side.
Here is a before and after shot of just a brief cleaning of the front brake. All of my CBs are pre 1973, which is the first year to feature a disc brake up front.
Here are a few glamor shots. Can you see what I mean about the good side?
Here are some before and after pictures of polishing the rear shocks. I used the same turtle wax chrome polish was quite pleased with the results. I used the same product on the pipes and the engine case, though the engine case isn't chrome. It still made a positive difference.
The OEM relay for the turn signals is pretty primitive. There is an element inside that flahses based on thermal expansion, so the flash speed is dependent on the voltage supplied. While it may seem that the 12-volt system would provide a steady 12-volts, this is entirely not the case. The truth is that the electrical system voltage varies depending on several conditions. These fluctuations mean that the flash rate changes frequently, especially with engine speed. With a weak battery, the signals didn't flash at all at low engine speeds. Thanks to some improvements in electronics over the past 38 years, there are some better alternatives out there. I got this flasher through the regular auto parts supply chanels and was pleased to see that it fit with no modification. The wire terminals were the same, and it even fit into the old rubber housing that used to hold the stock flasher. Of course my old rubber housing failed soon after I put the flasher in, but that is simply because the rubber wasn't any good.
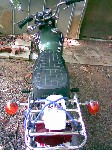
I was riding down the interstate the other day at about 70, and one of the cylinders cut out. The other cylinder was running pretty well, so I was able to get to the next exit by riding down the shoulder. I didn't want to try and ride it all the way home, so Richard and Kari came and picked me up. I came back with the trailer and took it home. I drained the fuel from the tank and carbs, and checked the compression. I had 120 psi on one cylinder and 60 psi on the other. At first I thought that this was a certain sign of the source of my trouble. I've since heard that perhaps the compression would have been like that before I ever started working on it, and that my breakdown was a matter of something else. This is quite likely, but at any rate, now it's winter. Since I've already started rebuilding another engine, I'll just focus on finishing it so that I can have a more reliable powerplant. Meanwhile, I've been stripping the rest of the parts off of my identical 1972 parts bike. Almost all of the chrome is better on the parts bike, but I don't have a title for it. When I reassemble the green 1972 bike that is pictured at the start of this page, I'll take the best parts off of either of the two, and reassemble it in a mostly stock configuration. Below you can see pictures of the disassembly of the parts bike, which are documentation in case I forget how to put it all back together.
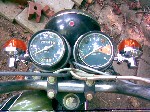
The odometer picture is so that I can have the mileage. If I assume that the engine and spedometer are both original, then that is the mileage on the engine, which seems pretty low to me. The engine on the parts bike is stuck for now, but I'm hoping it will free up with some air pressure.
I was hoping to find some decent rubber under the tachometer so that I could replace the poor rubber on the SL175. These weren't in much better shape! The second picture below is something you really don't want to see. In case it isn't apparent, you'll notice that the threads are broken off just at their start, and as you may guess, they remain in the head. I tried briefly to use an extractor to remove the threads, but I'm really concerned about breaking the tool off in the hole. That would certainly scrap the head as far as I know.
Here are some pictures of the disassembly of the titled 350, once agan for documentation.
Here is an attempt to refinish the underside of a fender. The outside chrome is in great shape, so I wanted to remove the rust on the bottom and apply a protective coating. I used a wire brush to clean it up and then painted it, though I forgot to take a picture after the paint.
What do you think of this? It made a great electrode for my rust removal science project.
Click here for part 3
| Home | Contact Me | Copyright © 2014 Jared Yates - All Rights Reserved |
|
Privacy Policy | |
| This page last modified 06/21/24 | |||||